Monday, November 11, 2013

Thanksgiving

When I think about Thanksgiving, of course the very first thing that pops into my head is well duh, the FOOD! Turkey, ham, corn, sweet potatoes, cranberry sauce, green been casseroles, oh I can go on and on, and we haven't even addressed the desserts and the wonderful pumpkin pie! 

I will never forget the year that my Mom and I went to my Aunt and Uncle's house in MA for Thanksgiving. I remember being told that I was in charge of making a dish. Me? Cook? Let me tell you a little secret.... as a youngin, well, boiling water was a challenge. However, after doing some research, I decided that I would be in charge of the Cranberry Sauce. Easy peasy.... open can, dump on plate, make it look pretty. 

The house was full. All of my cousins were there, Aunts and Uncles, and Grandparents. The plan was to eat around 2pm. We all sat around just enjoying each others company, playing games, being kids. Then all of a sudden tragedy struck. Somehow, in the mess of it all the oven turned off and our Turkey was FAR from being done. My Aunt was so upset. I remember just hearing swear word after swear word flowing out of her mouth, which of course just made us all laugh. We didn't end up eating that day until around 6pm. Although it wasn't ideal and we swore we were being starved, it was a day I'll always remember. A memory that will always stick with me. 

Although the food is wonderful, Thanksgiving is a time to enjoy the people around you, enjoy the things that you have, and be thankful for all of the wonderful little treasures in your life. My life has been full of so much change over the last year, however I am so incredibly thankful for so many things. I am thankful for my beautiful children. They are my world and have taught me so much more than I could have ever imagined. I am thankful for my parents for standing by my side and supporting me, and I am thankful for my friends. The ones that I have known for more than half of my life and have always had my back. The ones that I can always count on. Although my life is far from perfect, it is a beautiful mess and I am thankful for it. 

Last Thanksgiving, I hosted the family dinner for around 22 people. Here are a few pictures of the food, the crafts, and the table setup. My favorite of course was the Turkey biscuit holder. My kids love doing crafts, and I of course love enabling their creative little minds. So we cut up paper, used jumbo popsicle sticks and they created all of the turkey's feathers. From their, we used a big bowl as the base, used some craft paper to create the Turkey head, and then glued it all together. This was not only a blast to make, but the kids loved how everyone commented on it at dinner. 

The Turkey Biscuit Holder Made by the Kids

"Giving Thanks" Candles that I made with white candles, burlap, and black felt. 
One side reads "Thanks" while the other reads "Giving"


 Thanksgiving Menu: Turkey, Ham, Mac & Cheese, Green Bean Casserole, Honey Glazed Carrots, Corn, Garlic Mashed Potatoes, Rolls, Cranberry Sauce, and Stuffing


Delicious Pumpkin Cheesecake Decorated with Candy Corn and Candy Pumpkins
Surrounded by Pumpkin Cookies


Friday, July 19, 2013

Healthy Summer Salads

Have you ever had one of those days where you are hungry, yet you just aren't quite sure what you'd like to eat? Well that has seemed to be my everyday for quite a while. It was always lunchtime where I struggled. I have recently been on a health kick and am trying my absolute hardest to eat healthier. Whereas the lunch I would prefer to eat would be a delicious grilled 4 cheese and ham sandwich with a side of sour cream and onion potato chips...... I am now eating salads!

I will admit that I have loved finding new recipes for salads. The options are endless and easily customizable which is fantastic. Now if you're anything like me, I tend to be lazy when it comes to preparing myself a meal. This makes it hard to stay healthy when it's easier just to order something in. However, due to a friend of mine's wisdom..... I have recently been introduced to the world of Salads in a Jar. What a genious idea!!! So the other day, I went to it and created the food prep line. I had cheeses, cucumbers, multi-colored bell peppers, tomatoes, grilled chicken strips, carved turkey, ham, carrotts, baby spinach and arugula, and a few different low fat dressings.

The most important part of this salad is the order! Remember that the dressing always goes first and the lettuce always goes last. In order it should go: Dressing,veggies, meats, cheese, lettuce.


Greek Chicken Salad (335 Calories)

1. Pour in two tablespoons of low fat Greek dressing
2. Add a 1/4 cup of matchstick carrots
3. Add half of a mini cucumber, thick slices.
4. Add 5 grape tomatoes
5. Add a 1/2 cup of grille chicken strips
6. Add a 1/4 cup of feta heese
7. Fill the rest of the jar with baby spinach

Once you have filled the jar with all of your ingredients, you then will need to seal your mason jar for freshness. This can be done a multiple of ways.

The poor man's version: Poke a hole into the top of the canning lid with a thumbtack. Gently cover the hole with a small piece of electrical tape (Do not press down too hard). Then use a hand pump or electric food saver vacuum. (I use the reynolds handi-vac) and place it on top of the piece of tape. Begin to vacuum the air out. This will only take about 30 secs to a minute depening on what device you are using. When you are done, you will see an air bubble that has formed from the tape, push the tape down hard and secure the tape. Ta-Da! Easy Peasy!

Food-Saver Jar sealer: You can purchase a regular mouth jar sealer on amazon for about $10.00. For this method, all you need to do is place the device over the canning lid, and then use a vaccum or hand pump to remove all the air from the jar.

Once the lids have been sealed.... these salads will stay fresh for at least 5 days! Talk about convenience.


Another simple and delicious salad that I have grown to love is just a plain old pepper salad which is shown above on the far right jar. For this salad all you need to do is cut up some bell peppers, and mix in a tiny bit of extra virgin olive oil, a dash of pepper, and a little bit of mild shredded cheddar cheese. Not only is it filling but it is also extremely good for you!


Thursday, July 11, 2013

A Chic and Shabby Shower

Parties and dresses and weddings oh my! Wedding season was in full effect, and my sister-in-law's wedding was around the corner. As we began the planning process, we decided the best way to go about it was to split up the tasks. My mother-in-law being the sentimental one, would take care of bringing a touch of old memories into the night. My sister-in-law Sarah being the amazing cook that she is, would be in charge of the menu, and I was put in charge of the games and decor.

The Decor:
I of course began my research by looking at pinterest. I wanted vintage shabby chic.... just like Ame. After hours of pinning, I finally had an idea in my head of how I wanted it all to look. The first step was pictures. I went onto shutterfly (which always seems to be the least expensive in my opinion) and printed all of the pictures that I had of Mike and Ame. I also chose my favorite pictures and printed a combination of black and whites and sepias ranging between 4x6 and 5x7's. After printing the pictures, I then took off for the fun part.... SHOPPING!

First stop, was Tuesday Morning. I was so excited when I found a variety of photo frames that had an aged look. I also found a few big pieces of artwork that were on clearance that I would cover in chalkboard paint and use as decor. Ame has always had a love for vintage items and antiques, so these pieces fit right in. I then went to Michaels and purchased a few little knick knacks and personalized items that I knew would fit the overall theme.

After seeing the venue of where the shower would be held, I wanted to create some sort of centerpiece that was simple, but pretty. I did not want flowers but something like it. I then decided to create paper fans. I pulled out the scrapbooking box, and went to it. This was a lot of fun because my daughter was also able to help me make them. For some of them, I glued doilies to the back to add a little more elegance, where as others I glued a button or jewel in the center. These were extremely easy to make and added a lot of personalized touch and color to the overall decor.


 The way that the venue was setup, I knew I would need some sort of banner to be hung across the door frame going into the room where she would be opening presents. I looked at a lot of different ideas, but wasn't sold on any of them. A friend of mine then gave me a great idea to just make my own banner. I went back to Michaels and bought two packs of their cardboard hearts that are found in the children's crafts section. I bought a roll of thick twine. Lastly, I bought a metallic spray paint. When I got home I, laid them on the ground and began to unevenly spray the hearts. I did not want the fully covered but just textured. After they dried, I used a hole punch and threaded the twine thru the hearts. It turned out absolutely perfect for the area it was needed for.

 
Chalkboards:
 
For many of the decorational pieces I knew that I wanted to use chalkboards to create a more rustic look. However, if you have ever gone shopping for chalkboards, you will find that they can be pretty expensive to buy. That is when I came up with another plan. After buying some very inexpensive textured pieces of artwork at Tuesday Morning, I went to Michaels and bought chalkboard scrap paper, as well as some chalkboard spray paint. I used the chalkboard spray paint to cover the artwork canvases and these turned out great! I used these for the Guess the Age game, the menu, as well as the Bride and Groom's Timeline. I then used the scrapbook paper inside different frames to create the same rustic look.


Other simple and inexpensive decorations that I made were some wine bottles that were filled with Christmas lights. To make these, all you need is a glass drill bit, an empty wine bottle, and some Christmas lights. These turned out really great and add a nice touch in almost any environment.


 The Games:
Figuring out what games to play is where I think we all struggled the most. We did not want your average, lets wrap the bride in toilet paper and see who can make the prettiest wedding gown type of game. We needed something unique.... something different.

As I continued to look up ideas, I was inspired by a collage that listed the age of the bride at each picture. What a great way to showcase the bride over the years, but also make it fun.

Guess the age!

This was a huge hit at the shower and was extremely funny how off people's guesses were on most of the pictures. I will give you a little tip though. If you do decide to play this game, I would have a few pictures in the backup pile in case there's a tie. In our case, there was a tie so for the tie breaker, I held up 3 different pictures for 10 seconds each and made the girls guess the age.

Mike Money Madness

For the second game, we chose to do a little game of let's see how well the bride knows the groom. Normally this game is played as follows: the bride is asked multiple questions about the groom and for every questions she gets wrong, she has to put a piece of bubblegum in her mouth.

Well, due to my mother-in-law's concern that Ame would choke at her own bridal shower (gotta love how moms think), we decided to put a twist on the game. In attempts to get everyone involved, before people arrived, I taped an envelope under random chairs and tables throughout the room that were numbered 1-20. When it was time to play the game, I had everyone look under their chair and table to see if they had an envelope. Inside each envelope was a question to ask the bride about the groom and the answer. It was up to the person asking the question to use their judgement on whether or not her answer was suffice or not. Included in the envelope was also a single dollar bill. This made the game fun. For every right answer, Ame would be given the dollar bill, however for every wrong answer, the person that asked the question got to keep the dollar. Not only was this fun to watch Ame rack her brain in trying to figure out who her fiance's biggest celebrity crush in high school was, it was also a great way for everyone at the shower to learn a bit about her soon to be husband.

Good Wife's Guide

Ahhhhh the wonderful good wife's guide. This was something that I had found online as I was searching for a fun decorational piece for the shower. However, after reading over it, it was just too funny to not make it into an activity. After recreating and formatting the 1955 good wife's guide, I then also created an empty good wife's guide for Ame. The idea on this was that people could read what was written in 1955 and then write down a tip or guide for her now. This was hysterical to read and made for a great keepsake for the bride and groom.


The Food: Last but not least..... the amazing menu that Sarah came up with. The best part about the food, was that all of the items were incredibly easy to make, but were incredibly delicious!


Coconut Island Shrimp Canapes

Pistachio'd Grapes

Cranchix Salad Cups


 The Drink Station:


The Groom's sister decided that she wanted to make all of the party favors for the shower. She chose to make personalized glasses for everyone which turned out to be absolutely adorable. How many times do you go to a party and forget where you put your glass. With these, everyone was able to write their name on their cup, and have a cute and practical favor to bring home.

The drinks that we offered during the shower were White Sangria, Red Sangria, Cucumber Water, and Homemade Lemonade.


 LOVE IS SWEET:


The Sweets Table
Wine Cork Name Holders

French Vanilla Cupcakes with Orange Tangerine Frosting Covered in Edible Pearls


Red Velvet Cupcakes with Cream Cheese Frosting and Gold Shavings

Orange Supreme Cupcake with Green Buttercream Frosting Topped by a Gold Shimmer Spray


Overall the shower turned out be an absolute blast. It was classy, it was chic, and it was just what she wanted.


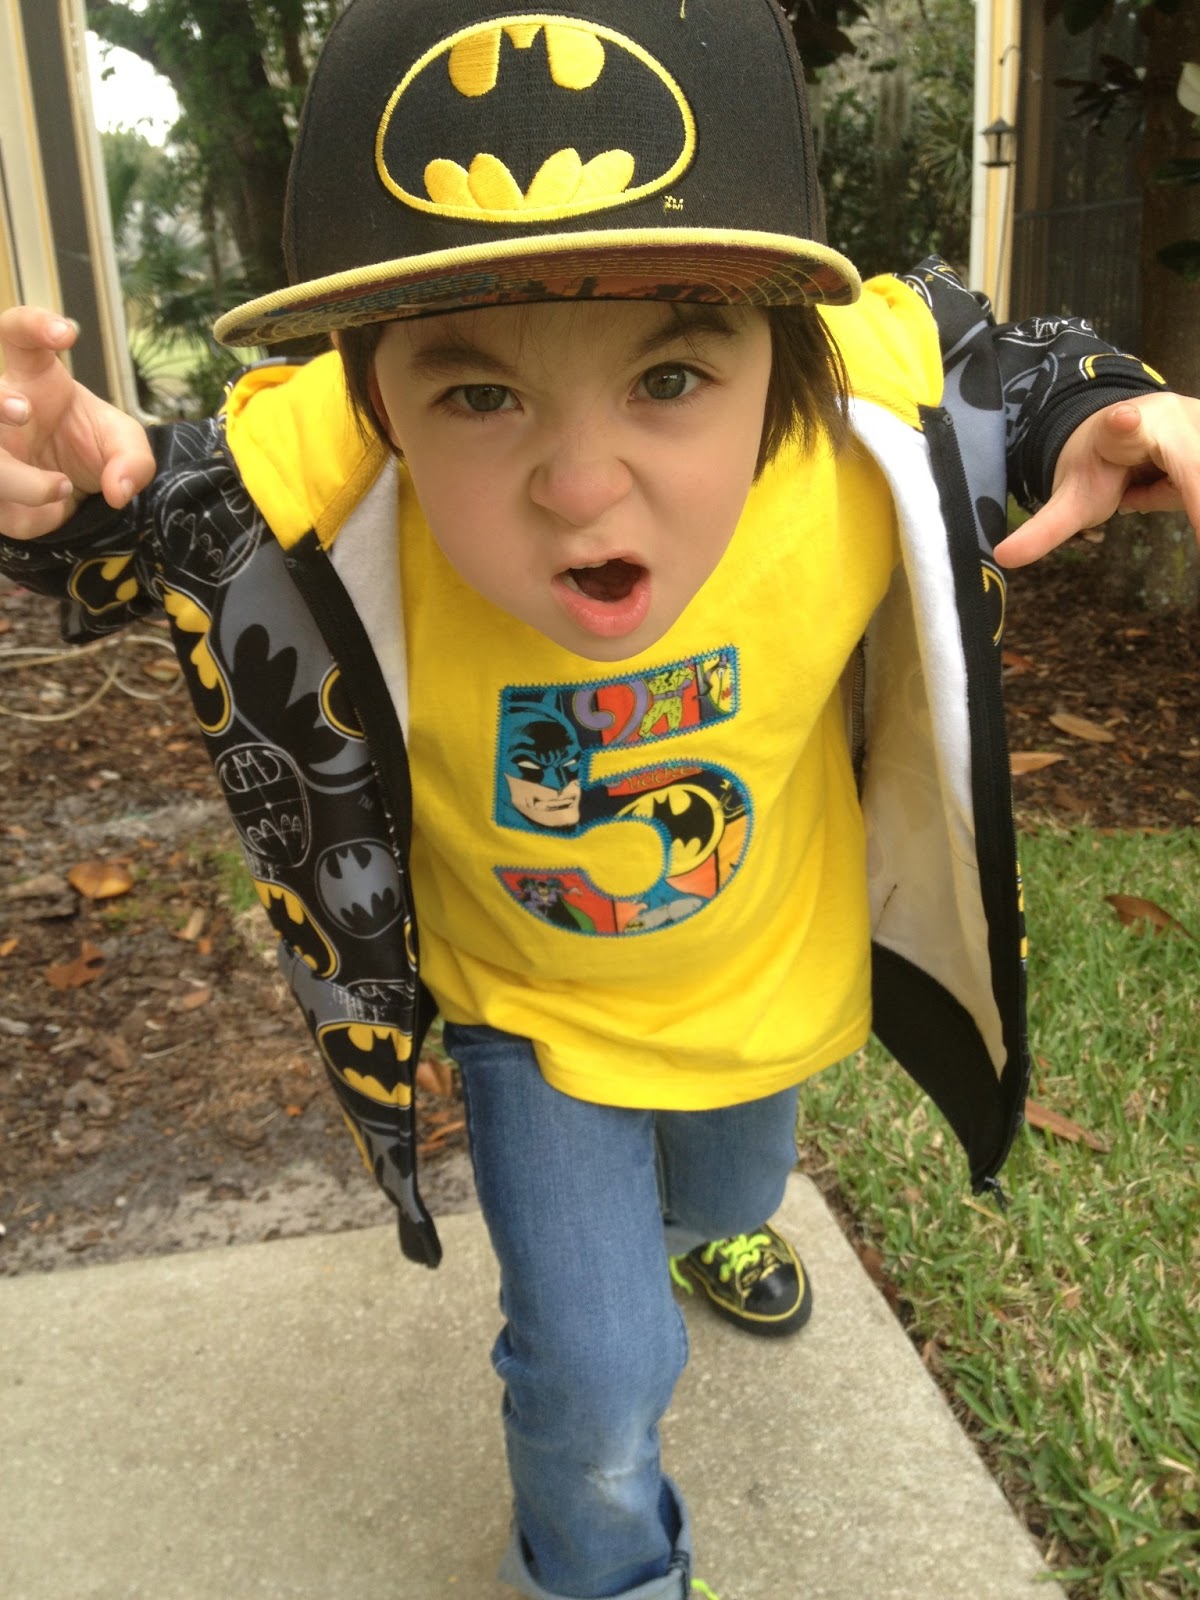
Bat-Landon Turns 5

My little boy was turning 5 years old and of course once again, he wanted a "Batman, and Superman, and Green Lantern, and ALL of the superheroes" type of party. So superheroes is what he shall get! After doing quite a bit of research for the perfect location, Landon decided he wanted to do miniature golf for his birthday. However, it wasn't just any kind of putt putt, but glow-in-the-dark putt putt....  Superhero Style!

First step was the invitation. With a little help from photoshop and some design time... I was happy with the final product. Superheroes unite!


Next, on the list was to come up with party favors. I sat outside on my porch with a pad of paper trying to come up with ideas when all of a sudden I was scared half to death as I heart a loud THUD. Quickly realizing what it was, I stormed out and picked up the stupid golf ball that the stupid golfer just hit my house with. Because I live on a golf course, this was quite a normal occurence. As I placed the ball in the bucket that was full of golf balls, it quickly dawned on me. Yes! That's it! Golf balls! I went to the store and bought bright yellow and pink paint, and then bought a black paint marker. It only took a few coats to cover the ball completely, and from there it was just allowing them to dry before using the paint marker to draw on them. I decided to make pink for the girls, and yellow for the boys. Talk about a cheap and easy party favor that was completely in theme. It was the only time I was thankful that the stupid golfer hit my house with that stupid ball!


Now for the heavy work..... The decorations.

After calling the venue, I was extremely happy once they told me that I was allowed to bring in my own snacks. From here, the creative juices began to flow. I went online and was able to print out a bunch of superhero characters. A friend of mine also found a book of superhero scrapbook paper which was a huge help in adding a little bit of flair. I began by cutting out the superheroes, then cutting strips of the scrapbook paper to tape them onto the mason jars, jugs, and vases. I also created little cards to go with each container stating what superpower was associated to what snack. We had, Penguin's Pretzels, Joker's Jackpot, Two-Face Oreos, and then suckers and candies that each had it's own designated super power strength. For the main centerpieces, I also created a batman and robin body, from styrofoam cubes, and used cake pop dowels and paper cones to hold batman and robin colored m&m's and skittles.

As a keepsake for Bat-Landon, I printed a picture of him in his batman costume and put it into a matted frame which was laid out for people to write messages on at the party. I almost left this one out, but am so thankful I didn't because Landon loves it! He constantly looks at it and can remember everyone that was at his party and read all of the little notes that were left for him.


Last but not least, the cupcake stand and the cupcakes. I definitely overdid it on these. Thankfully I had a wonderful and amazing family friend that helped create them. For the cupcake stand, we used just normal platters that were wrapped in tinfoil. I then found different types of superhero scrapbook paper to add some color to the stand. To hold the platters in place, I grabbed four soup cans and covered those with scrapbook paper as well. Once the platters were decorated, I glued a red fringed ribbon to the sides to make all the pieces come together.


We used fondant to create the shapes for the cupcakes, and then used fondant markers that allowed me to fill in all of the little details. Although it was a lot of work, the end result was amazing.

 Thanks to all of the little superheroes that came, Landon was able to celebrate his 5th birthday with a POW!


Sunday, June 17, 2012

Happy Father's Day

Today is Father's Day and although many cannot find enjoyment out of our American made up Holidays, I however love them. Father's Day is such an important day because it's just a time to tell Dad, or whoever may have been that older male role in your life, how much you appreciate and love them.

Thankfully for me, I have an amazing Dad who I love and adore. Although it took us quite a long time to be able to fully build a real relationship, I am forever blessed for who he his. The one thing that I always appreciated about my Dad is that since I was young, he has been a pretty successful guy. He has done very well for himself and provided a good and enjoyable life to those around him. The amazing part however, is that my Dad is extremely humble. That is something that I truly respect about him. Whether you were the most powerful and richest man he knew, or you were the janitor at his place of work.... he would treat and talk to you no different. I love my Dad and am thankful for all of his support over the years.

This year, I wanted to do something special for Father's Day. As I looked around the store trying to decide what to get him though, I found myself honestly just becoming annoyed. Every year it seems as though the stores try to get you to buy the same exact things. A tie, a grill, some tools.... the same old stuff. After coming home, I tried to think of other things we could give him as a gift this year that wasn't a total cliche. Then.... after some planning and strategizing, we came up with a perfect idea. I can't take all the credit on this one, because my kids really did all the work!


After taking over a 100 or so pictures to make sure that we had the right angles, I uploaded them onto my computer and resized to create the above images. I then sent the file to Kinko's and had it printed on to a Canvas which cost me $95. This included the print on canvas and having it mounted.

Wednesday, June 13, 2012

Cran Judy-Ann

Think back to your 21st birthday and what are the things that you are most excited about? Of Course. You are now legally allowed to drink and buy alcohol. If you are the "ideal" 21 year old, you have not experienced too much in drinking and are pretty new to this whole world of mixed drinks. So often the main question that stumps many new drinkers is the simple "What would you like today?".

I often laugh when I think about a story that my Brother-In-Law tells about his experience in ordering his first drink. He, like many others was a good ol' boy. He honestly didn't drink until he turned 21. Let me set the mood for you. He had just turned 21 and he pridefully walks into a bar with his head held up high. Excited to order his first real drink, and anticipating that they will ask for his ID so he can whip out that license and prove his age! Here we go..... he sits down and begins to look around. Oh wait a minute..... He needs a man drink. Not beer, not wine, but liquor! It wasn't long until the sweet older woman came over and said, "What can I get for you today". Without even thinking, he says very confidently "I'd like a jack and crown please!". You can imagine the smile that came upon her face as she heard this adorable youngin' just order a glass of Jack Daniels mixed with Crown Royal. For the rest of the night, the bartender made it her mission to introduce him to a multitude of different drinks, explaining what liquors compliment what mixer.

This story is what inspired me to do my next project. A very close family friend was turning 21. She is one of those girls that just has a lot of spunk to her. You know, sweet and spicy as I like to call her. Anyways, her 21st birthday party was coming up and I needed to do something different. She isn't the girl that I could just buy a bottle for and say enjoy. She was a girl that I needed to bring to the bar and have her try every drink known to man kind until she found what she liked. Instead however, after looking around, I came across a picture on Pinterest that had a bucket, that had small whiskey bottles and cigars nicely presented.

What a fabulous idea! I loved everything about it. The creativity, the options, the customization that could be done. This was it! Later that day I went to the craft store and came home with the following.


*1 Oval Black Metal Pail (as shown to left)
* 2 Large Packages of Tinseled Pipe Cleaners
*2 Large Packages of Colored Pipe Cleaners
*Alphabet Stickers (Found in Scrapbooking)
*Number Stickers
*Decoration Stickers (I used Candles & Swirls)
*Glitter Spray paint
*Medium package of decor rocks / gems
*Large square of Styrofoam
*21 Wooden Thin Dowels or Kabob Sticks
*21 Assorted 50ml. sample liquor bottles
                                                               *Long Tinsel Swirls 
                                                         *Bunch of Color Assorted Silk Flowers 
Step by Step
  1. Take the pail on a covered surface and put it upside down. Use the glitter spray paint and evenly coat the pail to add a sparkled effect. You can use as little or as much as you'd like.
  2. Using an exacto knife, cut ovals out of the styrofoam square. Layer the styrofoam ovals into the pail. You will want about 3 layers in the pail to be able to uphold the weight of the bottles. 
  3. After the pail has dried from the paint, Decorate the pail with the stickers that you have chosen. (For mine, I put wrapped around 21 candles from front to back, and scattered the swirls to add extra decor. You may also want to use a ruler to help center and space the writing on the front. 
  4. Organize your color patterns and figure out what colors you'd like to stick with for the main theme.
  5. Take one tinseled pipe cleaner and one colored pipe cleaner and begin to tightly wrap around the wooden dowel. (If you want, you can try to match the bottles colors). Begin wrapping about 2 inches above the bottom of the dowel and continue your way up. I used 4 pipe cleaners per wooden stick. 
  6. Once you get towards the top, choose the bottle that you would like and begin to tightly wrap around the neck of the bottle. You will need to wrap it around once, then tie in between to make sure it's tight. The tighter you can wrap it the better the bottle will hold. 
  7. Repeat step 6, another 20 times. 
  8. Once all 21 bottles are wrapped and tied to the wooden sticks, you can begin to put them into the pail by pushing the stick into the styrofoam. You can arrange the bottles many different ways according to the overall look you are going for. 
  9. After you are satisfied with your arrangement, you can add in some tinsel swirls for an additional decoration.
  10. Arrange the silk flowers around the rim of the pail.
  11. Lastly, take the package of the decorative rocks and empty them into the pail to cover the styrofoam and add additional weight to hold the dowels in place.
..... And there you have it. A perfectly unique 21st Birthday gift!